Canvas prints are easy to work with yet stunningly beautiful for home decorating. This tutorial will walk you through 3 simple ways to hang your stretched canvas:
Sawtooth Bracket | Command Canvas Picture Hanger® | Wire Hanging Kit
We’ll show you all the tools and knowledge you’ll need so you can successfully and easily hang and admire your canvas prints on any wall.
Canvas prints can be propped up on easels or on a table, but most canvas prints are hung on a wall. Choose which one works best for you, depending on your needs. Let’s learn how to do this!
General Hanging Tips
The first step to hanging stretched canvas or any piece of art is to determine where on the wall it should go. This is the trickiest part of the task, but don’t worry, it will only take a few minutes, some measuring and a few light marks with a pencil.
A good rule of thumb is to have the center of your canvas aligned at or slightly above eye level. We usually recommend between 57”-60” above the floor for bare walls. If you’re hanging the canvas next to or above any furniture you’ll want the print and the furniture to share a relationship. Usually stepping back and picturing where your print will go is good enough, but keeping 18” to 24” between the edge of your print and your furniture will be good if you want to be precise.
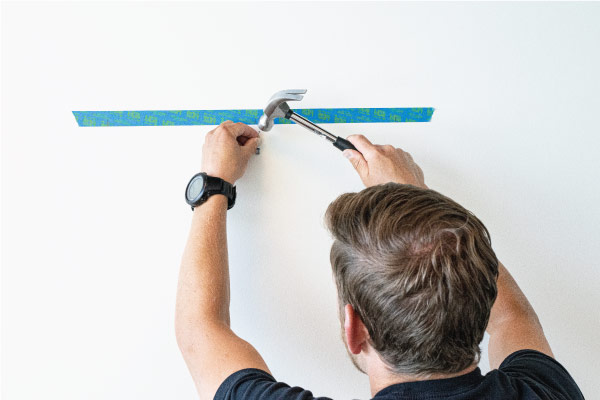
For all three hanging methods talked about in this post we use the “painters tape” trick to help you easily know where to place your nail, or hanger. Using a piece of standard 1” blue painters tape, you can “simulate” the top of your canvas on your wall and easily make the measurements for where to place the mounting hardware.
The painters tape method isn’t the only way to ensure your canvas hangs on the wall exactly where you want it. Simply measuring and marking the wall with pencil among several other methods are out there. The painters tape trick is simply easy to use and ensure a perfect hang every time. We’ll provide step-by-step instructions for how to do this with each of the three methods.
Sawtooth Bracket
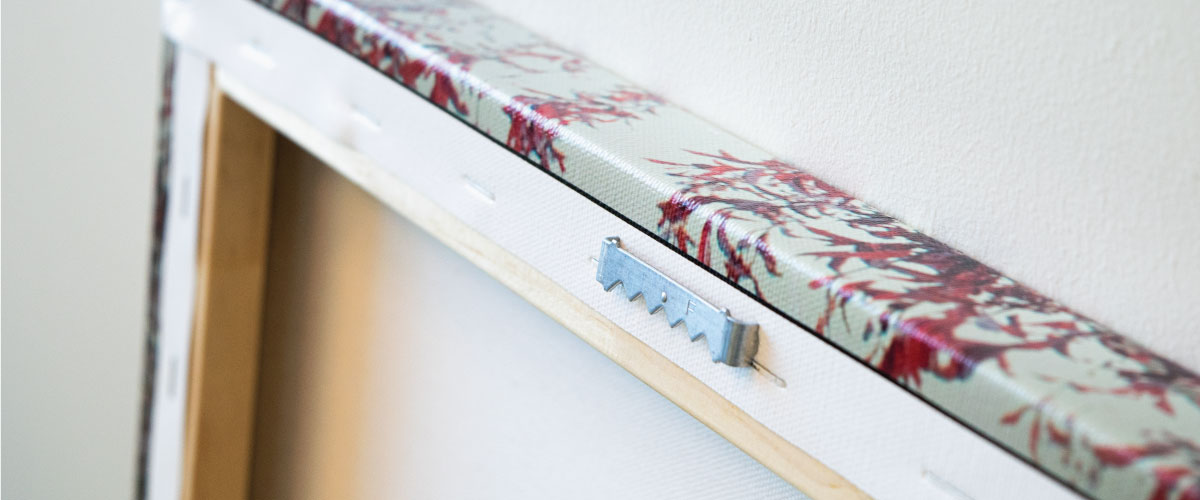
Sawtooth brackets are perhaps the most common method used for hanging canvas prints. They offer a low profile, are simple to install and can easily support the weight of your canvas print. Even if you’re hanging a large canvas print that is 4 feet wide, you don’t have to worry about the print falling off your wall.
If you order a canvas print from Signs.com, your print will include a sawtooth bracket already installed for hanging. Here’s how to hang it:
What you’ll need:
- Tape Measure
- Painters Tape
- Pencil
- Level
- Hammer
- Finishing Nail
Step 1: Set up your painters tape
Take a strip of painters tape that is a little longer than the width of your canvas print. Carefully place the tape along the top of the canvas so that the ends of the tape hang over both sides a little.
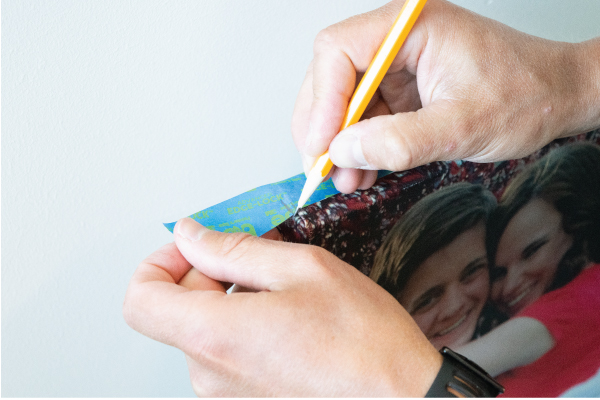
Use your pencil to mark both sides of the tape at the edge of the canvas (these marks are the width of your canvas print). Also, measure and mark the midpoint of the canvas on the tape with your pencil.
Remember that the tape represents the top of your canvas print. Use your tape measure to determine how high on the wall you want your canvas print to hang.
Once you know how high from the floor or furniture you want to place your canvas print, measure and make a light pencil mark on your wall. This mark will be where you will place the tape on the wall.
Here is an example: let’s say that im hanging my print on a bare wall. My canvas print is 24 inches wide and 18 inches high. I want the center of my picture to be at about eye level. The center of my picture is at 9” (18 devided by 2). I add 9 inches to 60 and measure from the floor to 69 inches. I’ll use my pencil to make a light mark on my wall at that height.

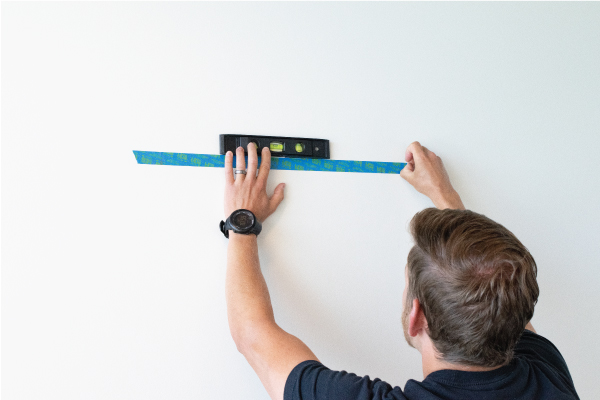
Carefully remove the tape from the top of your canvas print and place the tape on the wall at the mark you just made. The bottom of the tape represents the top edge of your print. Use a spirit level to help you adjust your tape so it is level.
Step 2: Mark the nail location
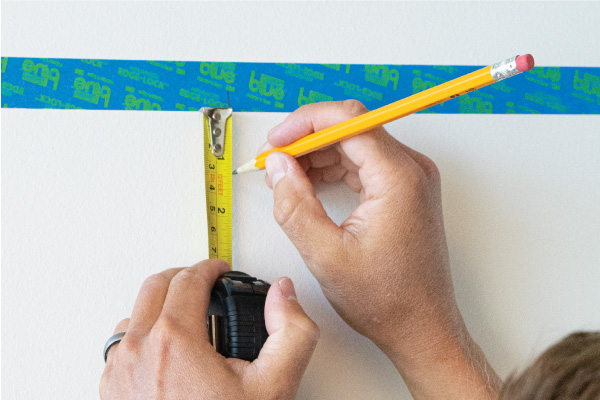
Measure from the top edge of your canvas print to the bottom of the sawtooth bracket, then transfer that measurement to the wall.
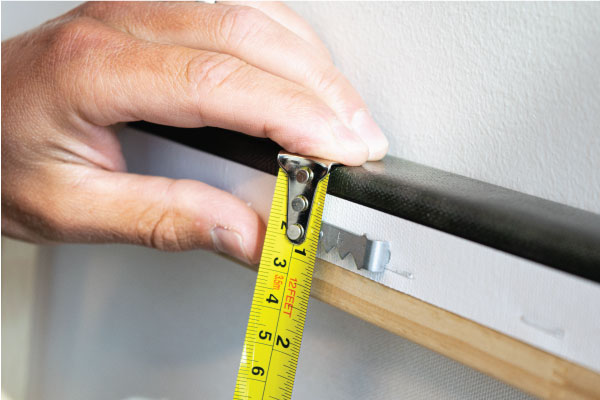
Find the center mark on your painters tape, and measure from the bottom edge of the painters tape at that mark down to your measurement. Make a light pencil mark on the wall where the nail will go.
Step 3: Set the nail and hang it up
Use your hammer and finishing nail to tap the nail in at the mark you just made. Angle your nail slightly downward so the head of the nail points up.

Canvas prints that are smaller than 18” x 18” are light enough that you could probably get away without nailing into a stud. For any canvas print larger than 18” x 18” we recommend that you use a stud finder or tap the wall to find your studs and move your nail location to that spot.
Remove the tape from the wall at this point.
Hang your canvas print on the nail with the sawtooth bracket and use your level one more time to make sure your canvas print hangs level.
Enjoy your newly hung canvas!
Command Canvas Picture Hanger®
Command® by 3M offers a wide range of products that make picture hanging super simple. With these picture hangers, you don’t have to use a hammer or damage your walls. One of the 3M products is specifically designed for fast, easy hanging for canvas prints. Canvas Picture Hangers use the famous damage-free hanging technology combined with a simple wedge-shaped plastic mount that applies directly to your wall. Once placed, you simply have to rest your canvas print on the canvas picture hanger and voila! You’ll have a beautifully hung canvas print.
Here is what you’ll need:
- Canvas Picture Hanger (Large or Jumbo size depending on the weight of your print)
- Tape Measure
- Level
- Painters Tape
- Pencil
Step 1: Preparation
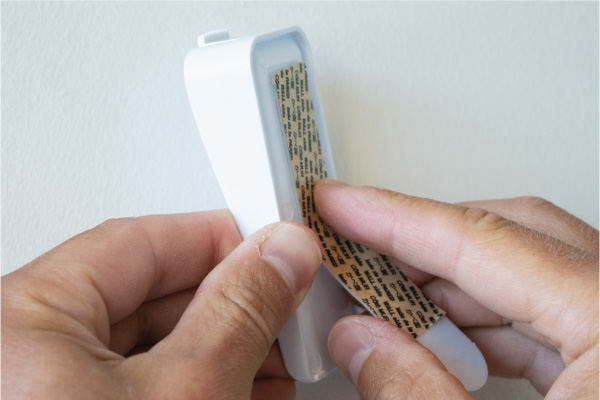
Prepare your wall where you want to hang your canvas print by cleaning it as best you can—we recommend using a damp, non-abrasive cloth to get rid of any dust or dirt on the wall. Also prepare your Canvas Picture Hanger if needed by removing the adhesive backing from the command strip on one side and placing it to the flat back area on the plastic Canvas Picture Hanger.
Step 2: Determine placement on the wall
Follow the same steps as you would for a Sawtooth bracket to determine where to hang your canvas print on the wall. Tape the top edge of your canvas print and mark the edges of the canvas and middle on the tape with your pencil.
Measure from the floor or furniture how high on the wall you want your canvas print to hang. Make a light pencil mark at that spot indicating where the top of your canvas will be.
Remove the tape from your canvas print and place it horizontally on the wall at your pencil mark. Use a spirit level to help you adjust the bottom edge of the tape to level.
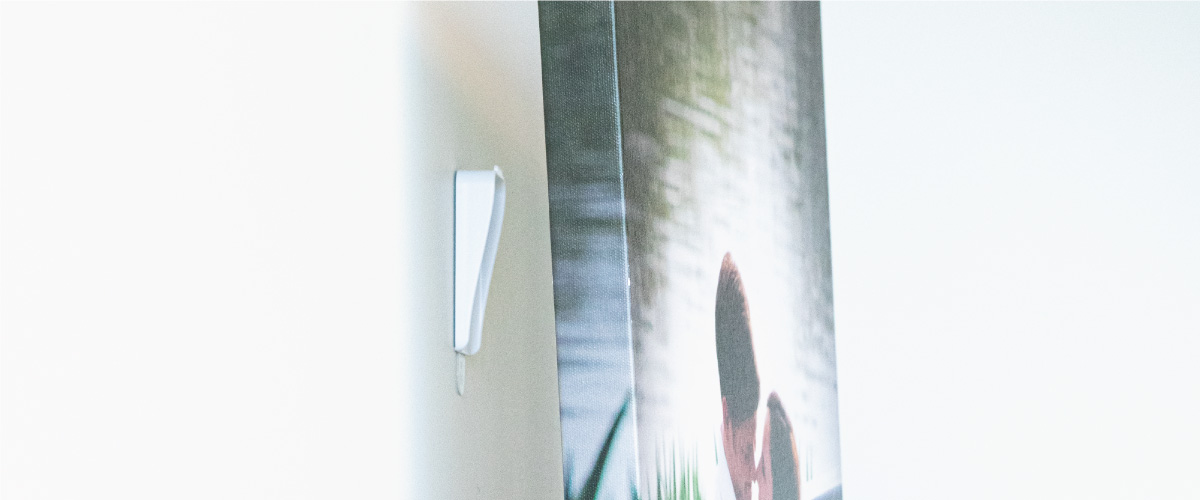
Step 3: Place your Command Canvas Picture Hanger®
From the back of your canvas print, measure the thickness of the frame from the top edge down to the bottom edge of the wood. (Signs.com canvas prints are 1.5” thick).
Transfer that measurement to your wall by measuring from the bottom of the tape to the desired spot. Make a light pencil mark indicating where to put your Command Canvas Picture Hanger®. Be sure to place your mark straight down from the center mark on the tape.
Remove the adhesive backing from the 3M Command strip on the back of your Command Canvas Picture Hanger®. Place the hanger on the wall with the top edge of the hanger at the pencil mark. Tip: use your spirit level to make sure your hanger is vertical and perpendicular to the tape before sticking the canvas hanger to the wall.
Remove the tape on the wall at this point.
Hang your canvas print on the Canvas Picture Hanger and enjoy!
Wire Hanging Kit
A wire hanging kit is another popular method used to hang canvas. There are several ways to do this, but the key is to set it up in a way that allows the back side of the frame to hang flat and parallel to the wall.
The wire is strung across the back about ⅓ down from the top of the canvas and held to both sides with fasteners. The canvas hangs against the wall on a screw or nail. This method is preferred for hanging pictures, paintings, and mirrors that are heavy—although it works well for lightweight canvas prints as well. The wire allows the frame to hang evenly and balanced on the wall.
While most canvas prints are light enough that they don’t need to be hung with a wire, here’s how to do it if you’re interested:
You’ll need:
- Wire hanging kit
- Painters Tape
- Level
- Pencil
- Hammer
- Nail & hook, or picture hanger
Step 1: Assemble the Wire Hanging Kit
The first thing to do once you have everything is to assemble the wire hanging kit to your canvas print. Simply Measure about ⅓ down from the top of your canvas print on the back side and make a pencil mark on each side.
Use your fingers to twist the D-rings or screw eyes at the pencil marks on the frame. Many of these D-rings are self-tapping screws, but a slight nail tap at the mark may be helpful to get your screw started.
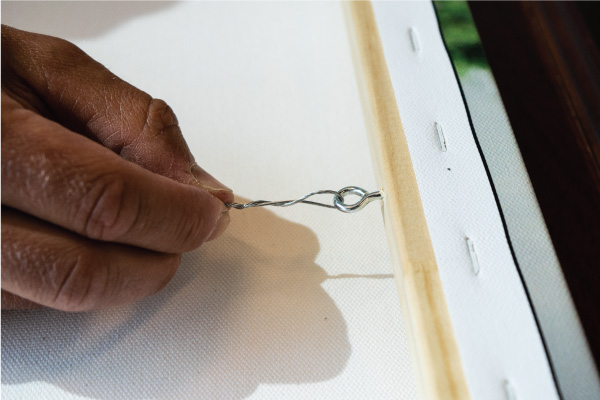
String the wire through the rings then tie a knot and twist the remaining tail back along the wire on both sides.
Step 2: Mark and Place Tape
Put a piece of painters tape along the top edge of your canvas print so the ends of the tape hand over both sides a little bit.
Use your pencil to mark the edges of the canvas print on the tape. Measure and mark the midpoint on the tape as well.

Measure from the floor or furniture to where you want the top of your canvas print to be on your wall. Make a light pencil mark on your wall at that location. Keep in mind where studs are for a more firm nail placement.
Remove the tape from the top of your canvas print and place it on the wall at the mark you just made. Use a spirit level to help you adjust the tape so that it is level.
Step 3: Set the Nail or Hook
From the back of your canvas, use your tape measure to pull the wire taught at the middle and measure up to the top edge of the frame.
Transfer that measurement to your wall by measuring from the bottom of the tape down. Use your pencil to make a light mark exactly down from the midpoint on the tape.
Use your hammer and nail or picture hook to set the nail in at the mark. Tip: if your using a nail and hook hanger, place the cradle of the hook, not the nail over your mark. This will make sure you canvas print will hang exactly where you intended it to.
Remove the tape on the wall at this point.
Hang the wire on your hook, and enjoy the newly hung canvas print!
Quick Tip:
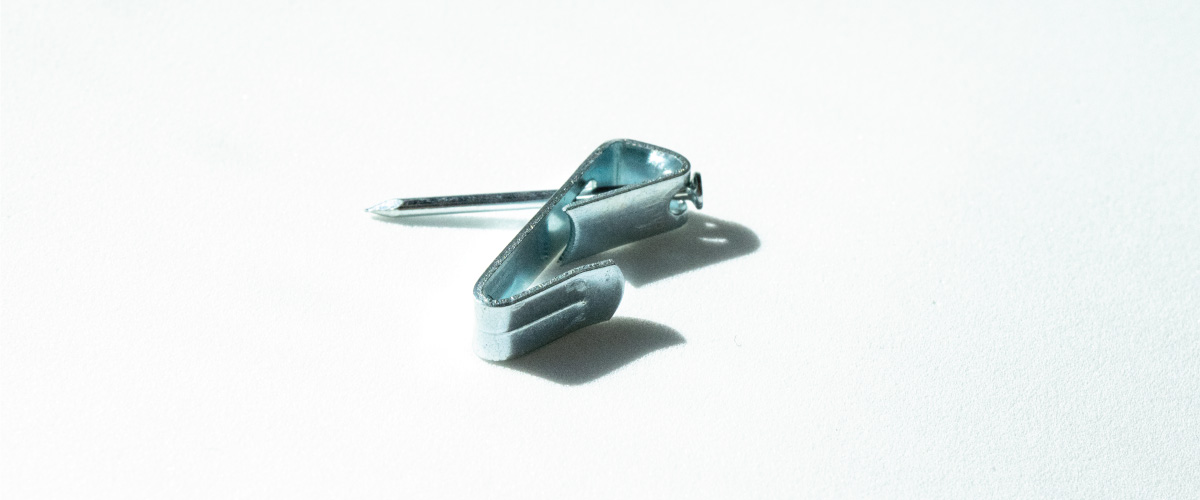
Canvas prints are generally lightweight, so you shouldn’t need to worry too much about nailing into a stud if your using method 1 or 3 to hang your print. If you have a large canvas print that weighs more than 15 lbs, you may want to use a stud finder to ensure that your nail won’t break through the drywall. Alternatively, a lot of people have had success hanging heavy pieces of art using Monkey Hooks.
While some of these hanging options are easier than others, all of them provide a great end result. If you’re interested in creating and hanging a set of canvas prints on a wall or just looking for ideas on how to decorate with canvas prints, check out our blog post on how to design a canvas wall gallery. If you want to get started displaying some of your favorite memories or simply create an appealing environment in your professional space, canvas prints are a fantastic way to do that.
https://goo.gl/hYDEHJ
No comments:
Post a Comment